French Provincial Dresser and matching Night Stands
Disclosure: This blog contains affiliate links. I will receive a commission for items purchased through these links at no extra cost to you. I appreciate your support. Please read all labels and follow all manufacturer safety recommendations when working with paints, stains, and other equipment.
This French Provincial dresser was redesigned for my best friend along with some night stands and a soon-to-come desk. For the most part, it was in great shape. The challenge with this piece was the top. The veneer was chipped and loose in some places. It wasn’t so bad that I had to replace it or take it off, I just used a filler on the chips and reglued the loose part. However, getting the top prepared to stain was a HUGE challenge. You’ve seen these dressers! They are everywhere and they are all painted that off-white color and are yellowing because of age. The top was painted in the same finish as you can see in the BEFORE picture, and it was like the paint was part of the wood instead of sitting on top like most paint. Let me take you through what I did to achieve this final finish.
Before:

Please excuse this bad picture. Sometimes I just forget to take before pictures. This one is from the auction site where I purchased the dresser. I’m sure now that you have seen it, you are familiar with this style. The top is solid wood but has a thin wood veneer on top. I tried sanding but I could tell that the finish on the top was going to be really difficult to get off, so I decided to strip. I’ve watched videos on stripping furniture but I don’t have a lot of experience doing it myself.
I applied Citristrip stripping gel and covered it with saran wrap and let it set for several hours. Keeping it wet is very important!

As you can see, the stripping gel definitely took off most of the paint but not all. This picture is after cleaning off the gel and then sanding but I still had a long way to go. It took a LOT of sanding to get to a clean finish that could be stained. But I did it! I persevered! Of course it would have been a lot easier if I could have just painted the top but my friend wanted a stained top. Anything for friends, right?
It was worth it though. Look at the final pictures at the bottom and I think you will agree.

Once I had the top sanded, I covered it and taped it up to protect it while I painted the rest. I took off the hardware (that is a whole other story), and did a scuff sand all over. I used my Wagner Flexio paint sprayer and applied a layer of primer and then 2 coats of Wise Owl One Hour Enamel paint in Antique Villa. This was my first time using One Hour Enamel paint and I love it! It goes on smooth, has a tough finish and no need for a top coat! I did sand between coats with a 220 grit sand paper (or higher) to get a really smooth finish.
Side note: I am new to spraying furniture but I have to say that it is a great alternative to brushing and saves a lot of time. I use a sprayer when I am applying only one color to a piece. I do not have a work space and I’m sure there are a lot of you out there that are in the same situation. I have a carport where I do my sanding and cleaning and then I bring my furniture inside. However, I can’t spray inside my house. So I bought a Wagner Spraytech painting tent and I use it every time I need to spray. It protects from the wind and keeps dust off of my furniture. I am providing a link below.
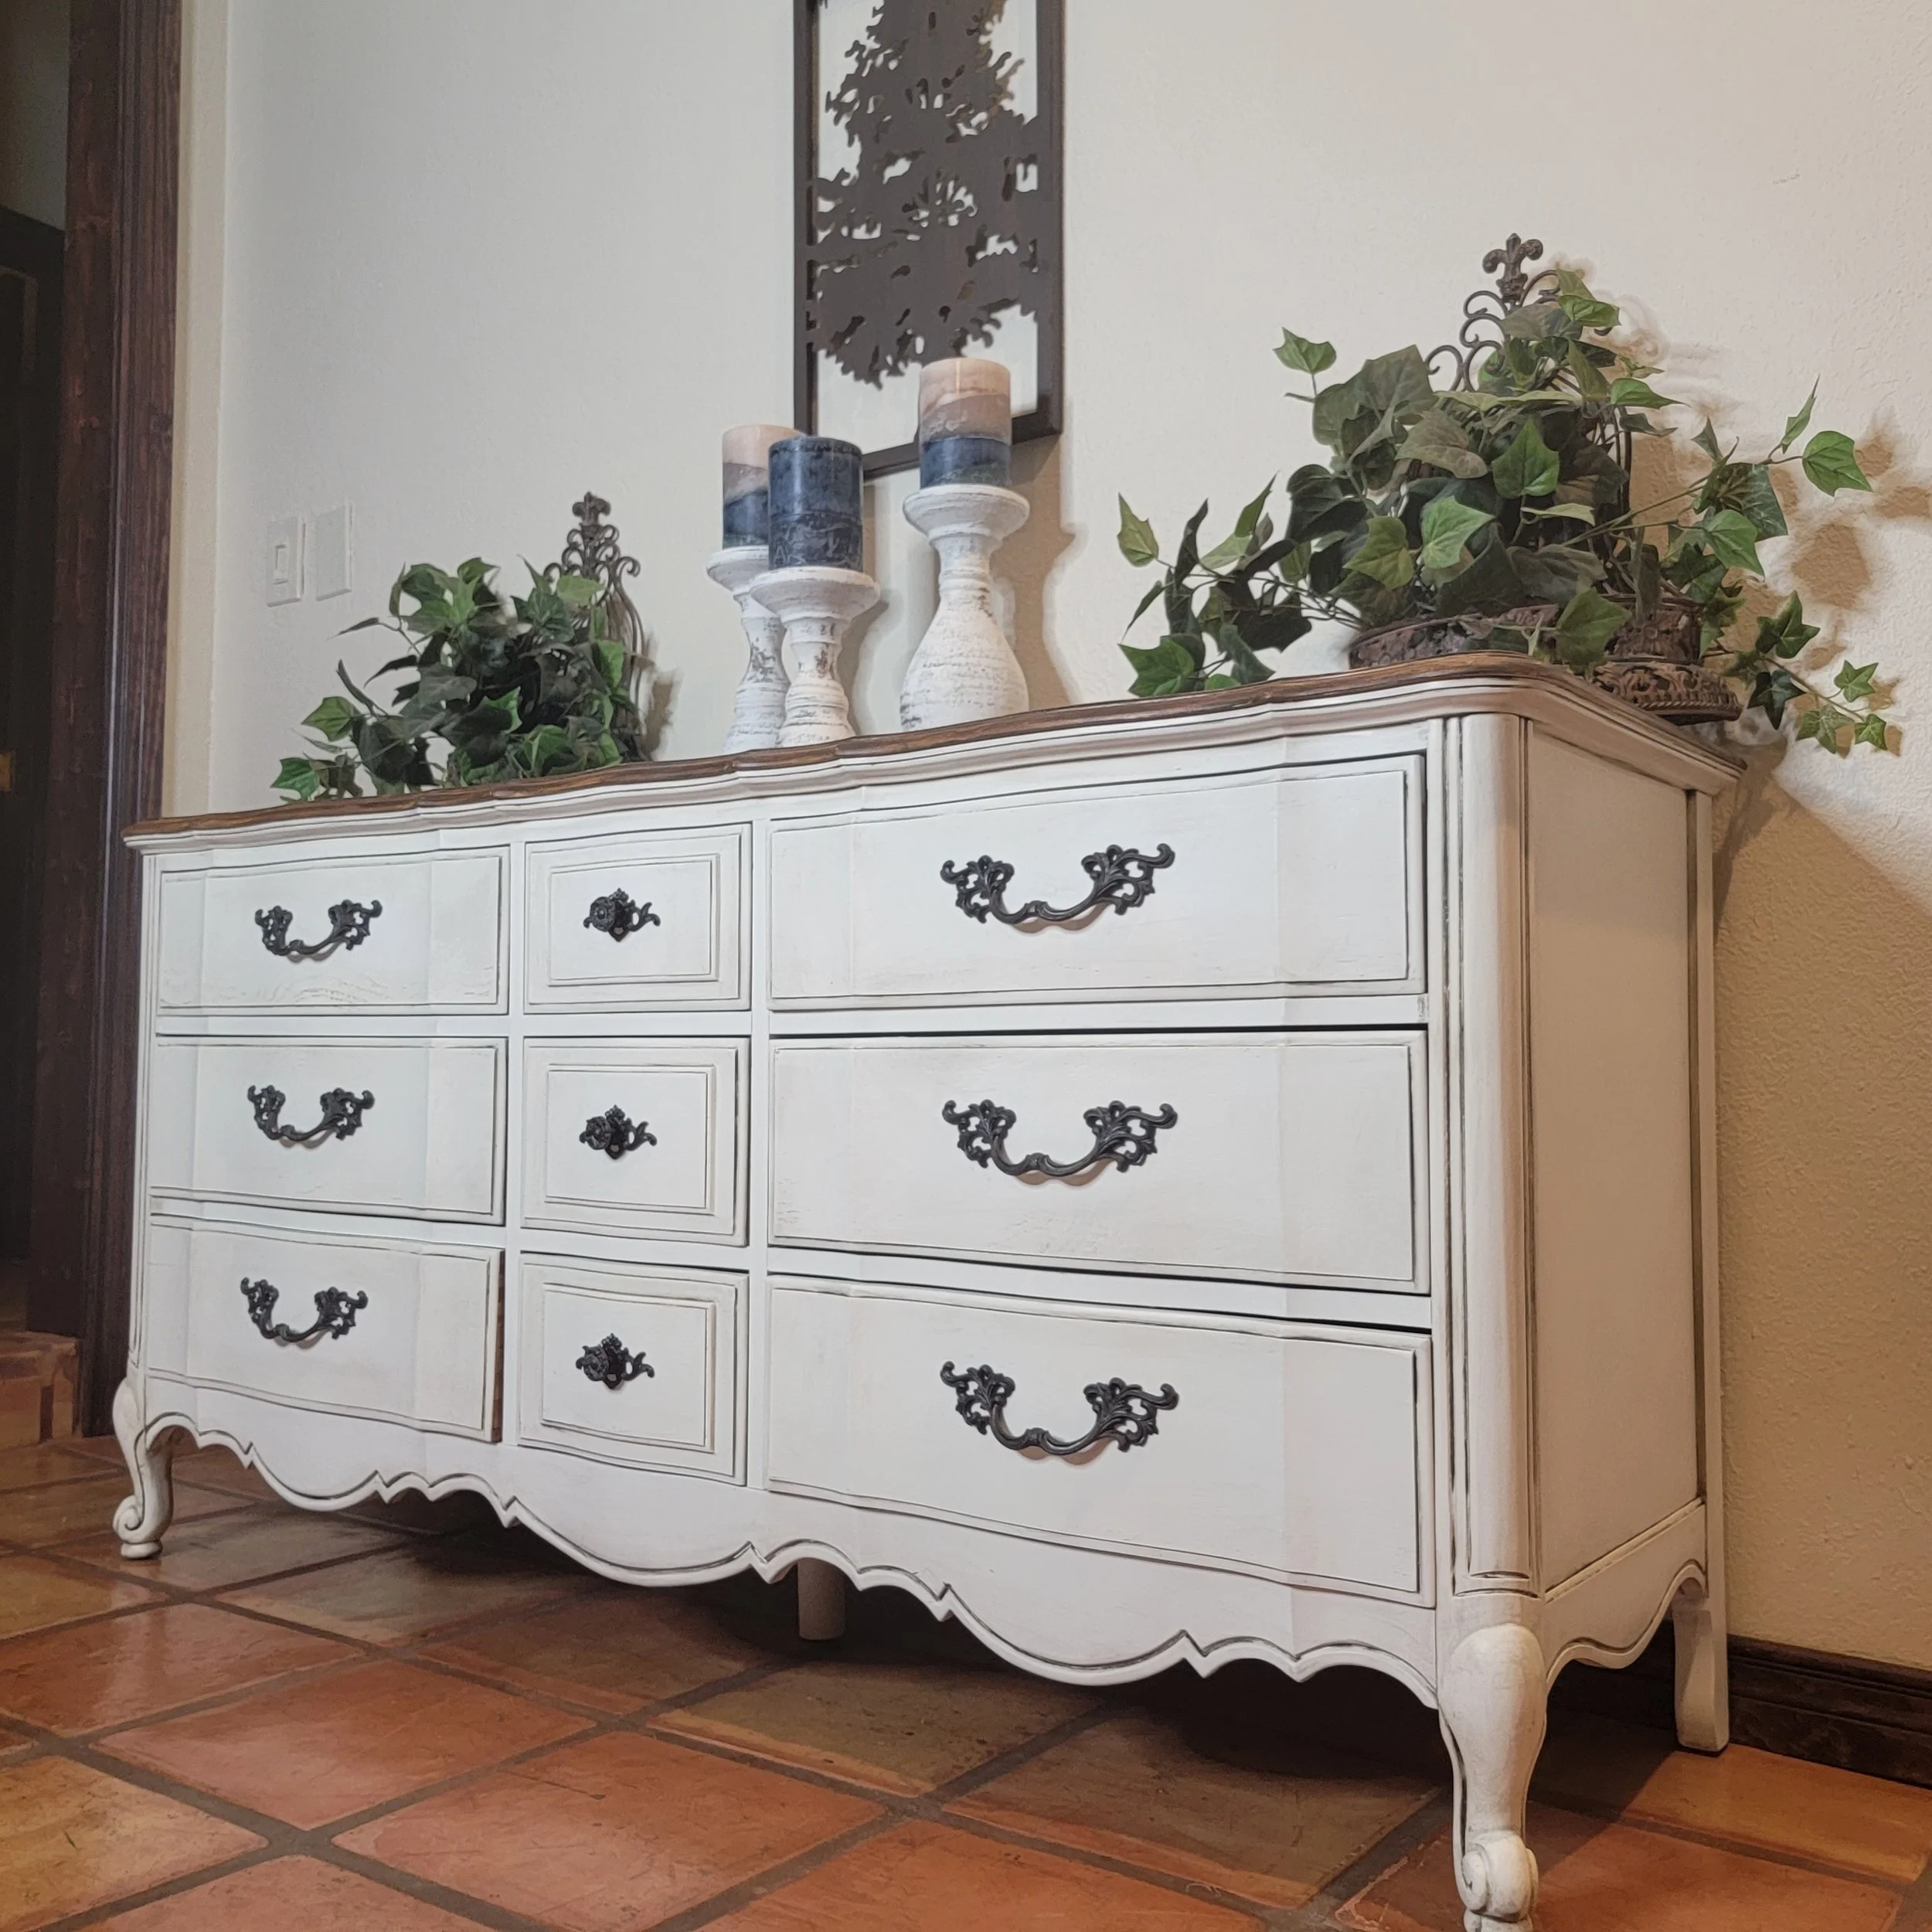
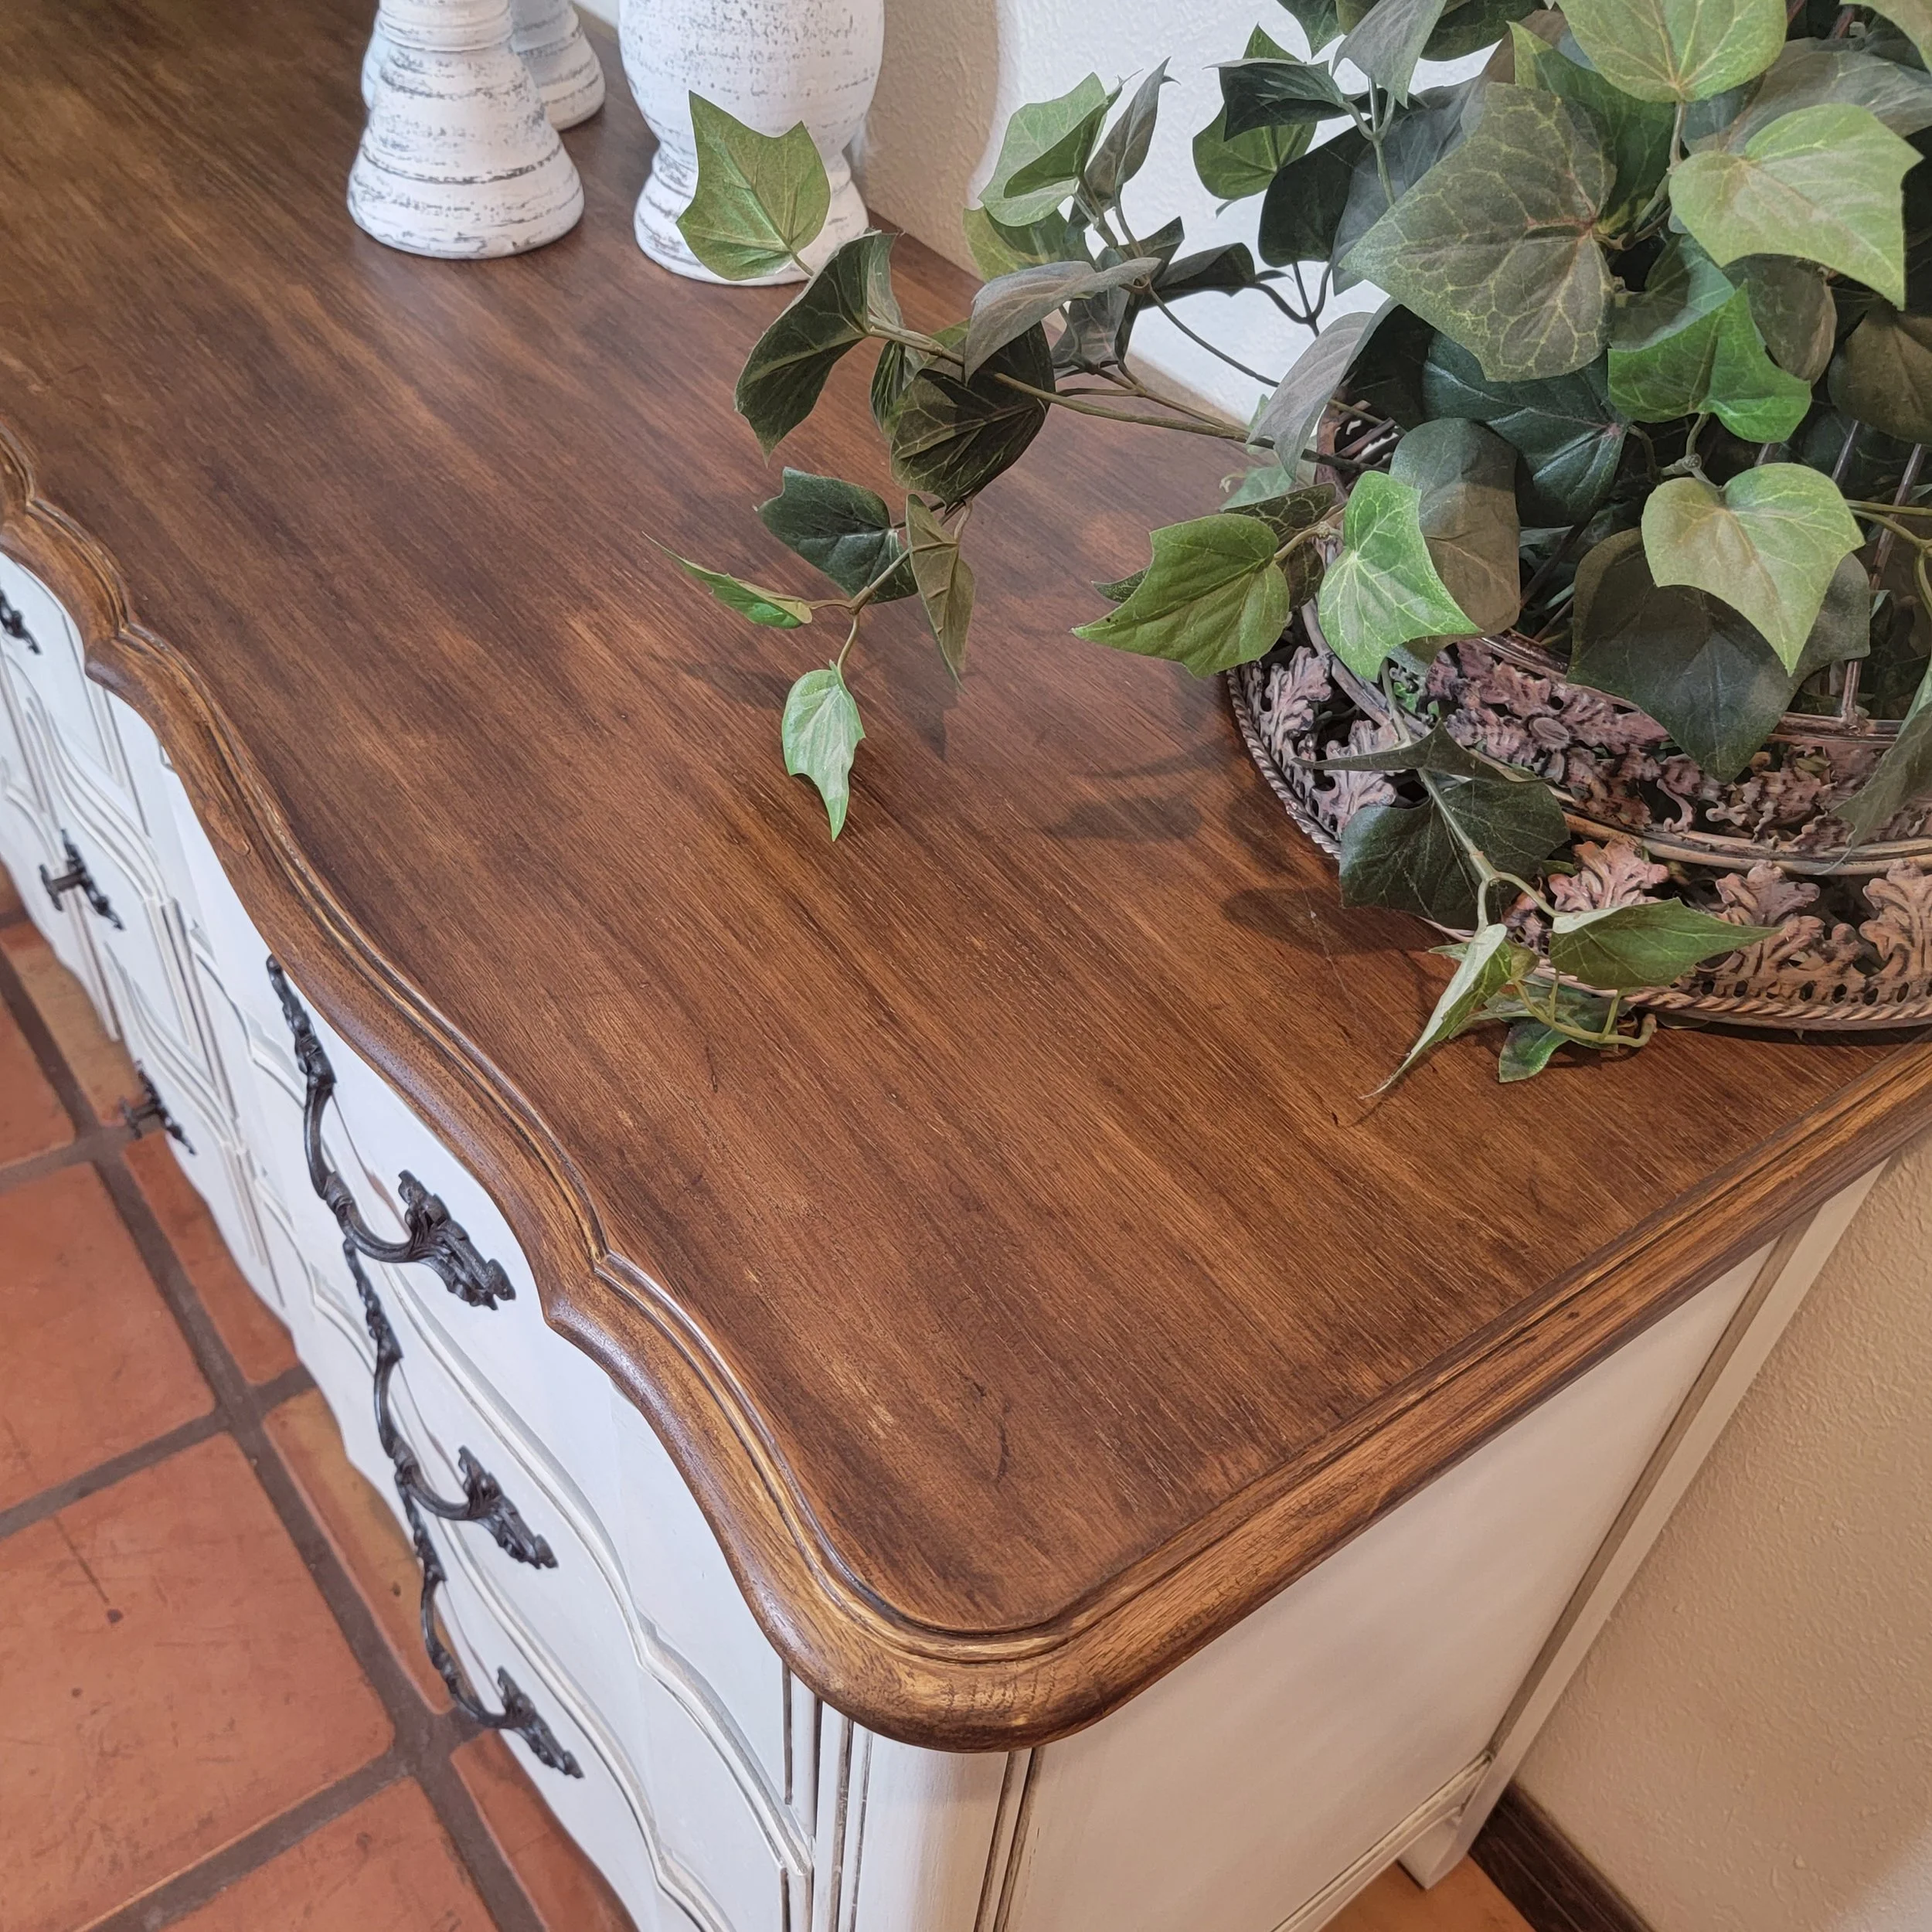


After letting the paint dry, I applied Wise Owl glaze in Dark Walnut (video below) to accentuate the edges and bring out the color of the hardware. Speaking of the hardware…..usually I just boil my hardware in a mixture of vinegar and water for awhile and then attack it with a wire brush and it comes clean. This hardware was painted but the paint was actually part of the metal. It would not come off! I ended up cleaning really good with my wire brush to make sure there were not flaking pieces and then I painted it with an Antique Bronze spray paint. That’s it! The last step was to stain the top. Look at how beautiful the tops of the dresser and night stands turned out! After that sketchy beginning, I wasn’t sure how they would look, especially the dresser.
Supplies used:
Wise Owl OHE in Antique Villa
Wise Owl Glaze in Dark Walnut
Wagner Spraytech Spray Shelter